Castle Grayskull Computer

Construction part 2

Grayskull | R&D | Construction | Construction 2 | Construction 3 | Final Product | Contact | Links

The next step was to get the motherboard properly mounted. Since the rear of the castle was mostly packed with drives and the power supply, the only available place was the front. However, an important consideration in this mod was to keep as much of the face of Grayskull intact, with no screws in it if at all possible. Adding to that was the complication brought on by the lack of a flat surface on which to mount the motherboard. That being the case, we chose to modify the mounting plate that was originally in the HP machines were were cannibalizing. Since we wouldn't be needing the rear access plate with holes for PCI devices and what-not, the rivets connecting that to the mounting plate were drilled out. This gave us our flat surface to mount the motherboard. With some brackets we made, the mounting plate was attached to the sides of the castle so the face could be screw-free.

mobomount.jpg

Above: mobo on plate with rear trim panel removed.

moboin.jpg

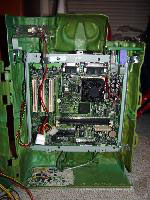
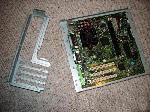
With the motherboard and its mounting plate in place we were given the added bonus of having a secure surface to affix the memory stick reader. This required a little bit of taking apart the reader and drilling/trimming the plastic to make it fit properly, but once it was in, it wasn't going anywhere. It also gave us a pretty sweet place to bracket one red LED 80mm case fan.


fan1.jpg

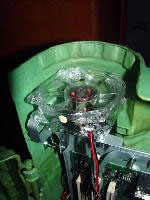
Above: With this setup, the air could blow up through the tower, [like a smoke stack] drawing heat off of the devices crammed inside. Later on, we will mount the other two.

memorystickin.jpg

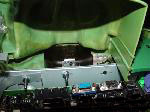
Above: Memory Stick Reader installed.

Enter supporting content here