|
We had to figure out how exactly that squeezing was going to happen. Of particular importance was making sure that we
could keep as much of the original castle intact as possible. This meant minimizing the number of cuts and drill-holes in
the plastic, especially on the face of it. Another vital consideration was the age of the plastic. Being as old as it was,
the plastic was bound to be brittle in places. The more weight that could be kept near the bottom of the castle, the better.
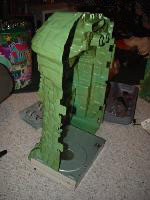
With that in mind, we started mounting as much as we could on the bottom of the rear half of the castle. The natural candidate
for the bottom component was the DVD-RW drive. Since there was nothing on the disk tray that would allow the drive to be mounted
vertically (the disks wouldn't stay in place), it had to be mounted horizontally. As this case is meant to be seen and will
live on top of a desk rather than under it, placing the drive on the bottom worked out well.
With the DVD-RW in place, the next things to go in would be the power supply and hard drive. The particular HP machines
we had access to have nice small Micro ATX power supplies (they aren't the best, but they do the job). This would go next
to the DVD-RW drive on the other side of the rear half of the castle. The doorway at that location was cut out to allow the
plug and air-intake on the power supply to have access to the outside world. A bracket was used to get that bad-boy in place.
A grill was made from a bit of cross-hatched material from Home Depot and a hole cut for the power cable. Upon
completion, it looked quite nice. <BR>
<BR>
The hard drive was mounted on top of the DVD-RW with a couple addional hand-made brackets.
Next we focused around getting some of the basic little (but necessary) parts mounted and set up properly. The two that
we focused on were the power switch, drive and power LEDs, and a USB memory stick reader.
First up, the power switch. The location chosen to place it was the upper right window on the front half of the castle. It
was just about the perfect size and would easily fit the switch. Unfortnately, the hole was just a little bit too big for
the mount plate that was originally on the HP Pavilion we ganked it from. No matter; adapt, improvise and overcome. We borrowed
a dark grey cover plate for an unused 3.5" bay and modified it to fit our needs. As a result, we ended with an adequately-sized
mounting plate for our power switch.
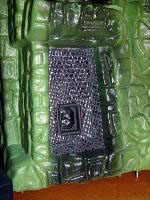
With the switch ready to go, it was the memory stick reader's turn. Originally, the reader had just hung outside of the case,
connected to a rear USB port. It was agreed that this was ugly and easily taken care of by mounting the card reader in the
brick-ornamented forehead of the castle face. The USB connection would be made internally.
The power and activity lights were mounted in the two vertical "wood" supports for the brick-ornamented forehead. You'll be
able to see these in the final product.
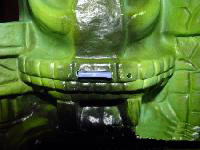
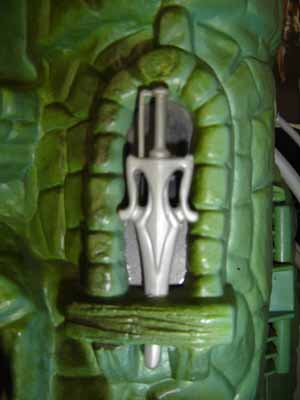
Above and below are photographs of the properly mounted memory stick reader and power switch (after a quick dremel job an
original power sword works great as a button cover!):
|